How to Modify Your Hosts File so You Can Test a Site That Is Not Yet Live
October 21, 2019 | | No Comments


The conventional process to start website involves following steps
- Choose a domain name for your website. You can search domain name on Smartgators portal Purchase a domain name from a this link.
- Choose a hosting company to host your website here
- Build your website. We can help you for developing your website if you are new for this.
- We will set up this for you if you buy domain name from us or you can Contact your registrar to direct the DNS servers to point web requests for content on your site to the server that’s hosting it.
- Many hosting companies supply a temporary alias that is added to your domain name so you can work on your site before making it live to the rest of the world. If you don’t have a temporary alias or don’t want to use it, but do need to access your website before contacting your registrar, you can modify the hosts file of your local machine.
A hosts file is a file that all browsers look at when getting a new website request prior to going to their DNS server. When you enter a website in your browser, your computer first looks at the hosts file for information and if it doesn’t find the website there, it requests the ISP’s DNS server to locate the IP address of the site.
Modify the Hosts File on a Windows 8 PC
Windows 8 protects the hosts file from modification by malicious programs. To modify it, you must run Notepad as an administrator.
Press the Windows key on your keyboard, type Notepad, but do NOT press Enter.
Right click on Notepad and choose Run as Administrator.
Log in (or have a someone with admin credentials log in).
Click File > Open.
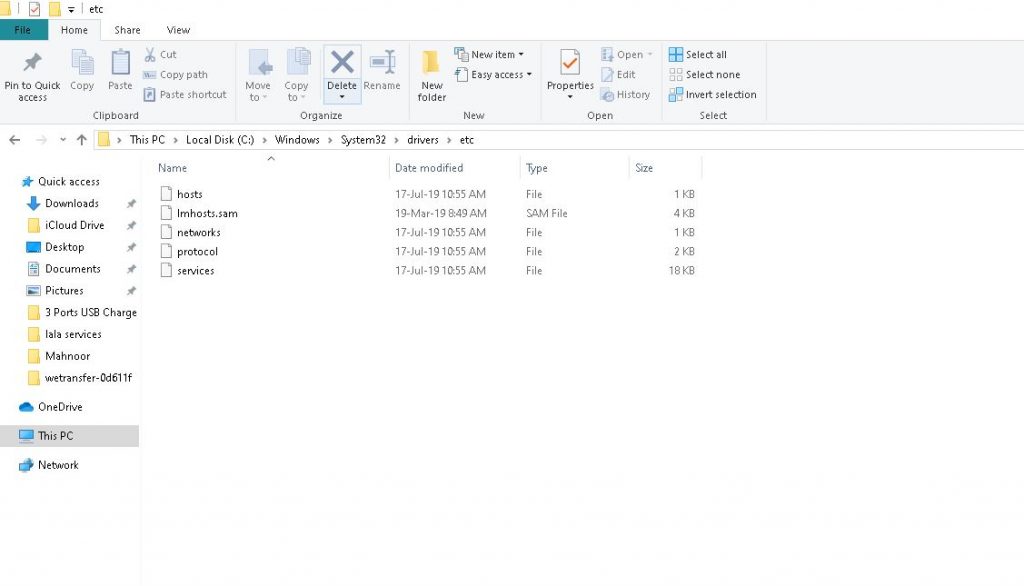
Navigate to C:\Windows\System32\drivers\etc.
In the lower right corner of the Open dialog box, change the Text Documents (*.txt) to All Files.
Modify the Hosts File on a Windows 7 or XP Machine
Click on Start > Run > c:.
Navigate to c:\Windows\System32\drivers\etc and double click on hosts.
Open it with Notepad.
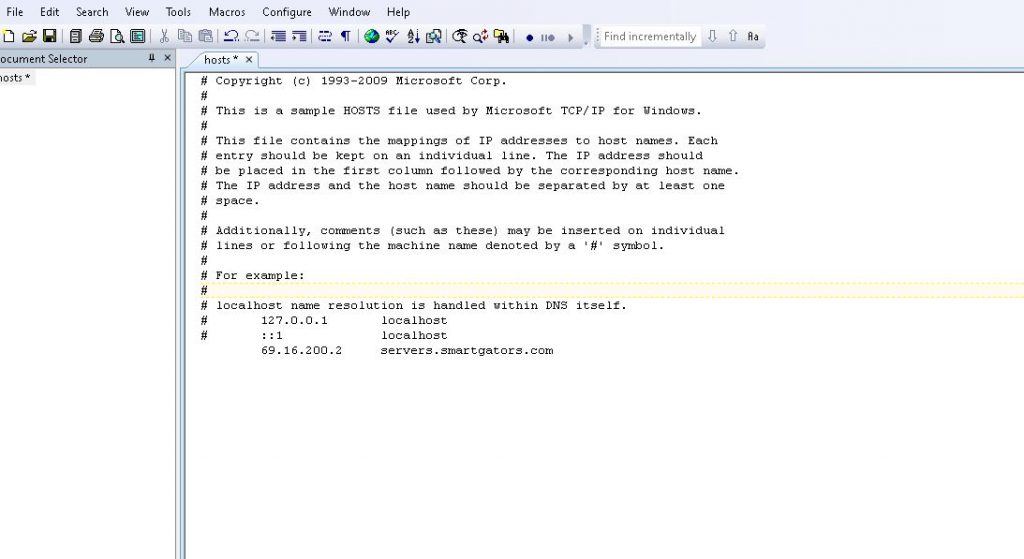
Hosts File
Add the IP address of the server that is hosting your website.
Press Tab and add the domain name of your website.
Save the hosts file.
Usually system will ask you to ” save as” so the best practice is you can copy the host file on desktop, make the required changes and paste back to C:\Windows\System32\drivers\etc
If you are unable to save it due to security policies on your computer, save it with a different name, like hosts2. Close Notepad. Delete the original hosts file and rename hosts2 to hosts.
You should be able to access your website (without a temporary alias) from your local machine by entering the domain name in the address bar of your browser.
Repeat the above process on any other machines you will be using when creating content for the site prior to making it live.
Modify the Hosts File on a Mac or Linux
Open the Terminal app.
Type sudo nano /private/etc/hosts. for Mac, sudo nano /etc/hosts for Linux.
Enter the IP address and domain name on a new line at the end of the file, as shown above.
Save.
